When it comes to keeping your belongings safe, true storage unit security isn't just about a strong lock. It’s a system of layered defences working in harmony.
Think of it like protecting a medieval castle. The facility’s outer fence is the first wall, the CCTV cameras are the watchtowers, and your own personal lock is the final keep, guarding the treasure inside. A weakness in any one of those layers can put everything at risk.
What Actually Keeps Your Storage Unit Secure?
To really get your head around storage unit security, you have to look past a single feature. It’s the combination of the facility's efforts and your own personal diligence that creates a genuinely protected space for your things.
The best way to visualise this is to break it down layer by layer. Each one has a specific job to do, and if one fails, the whole system can be compromised.
The Four Layers of Security
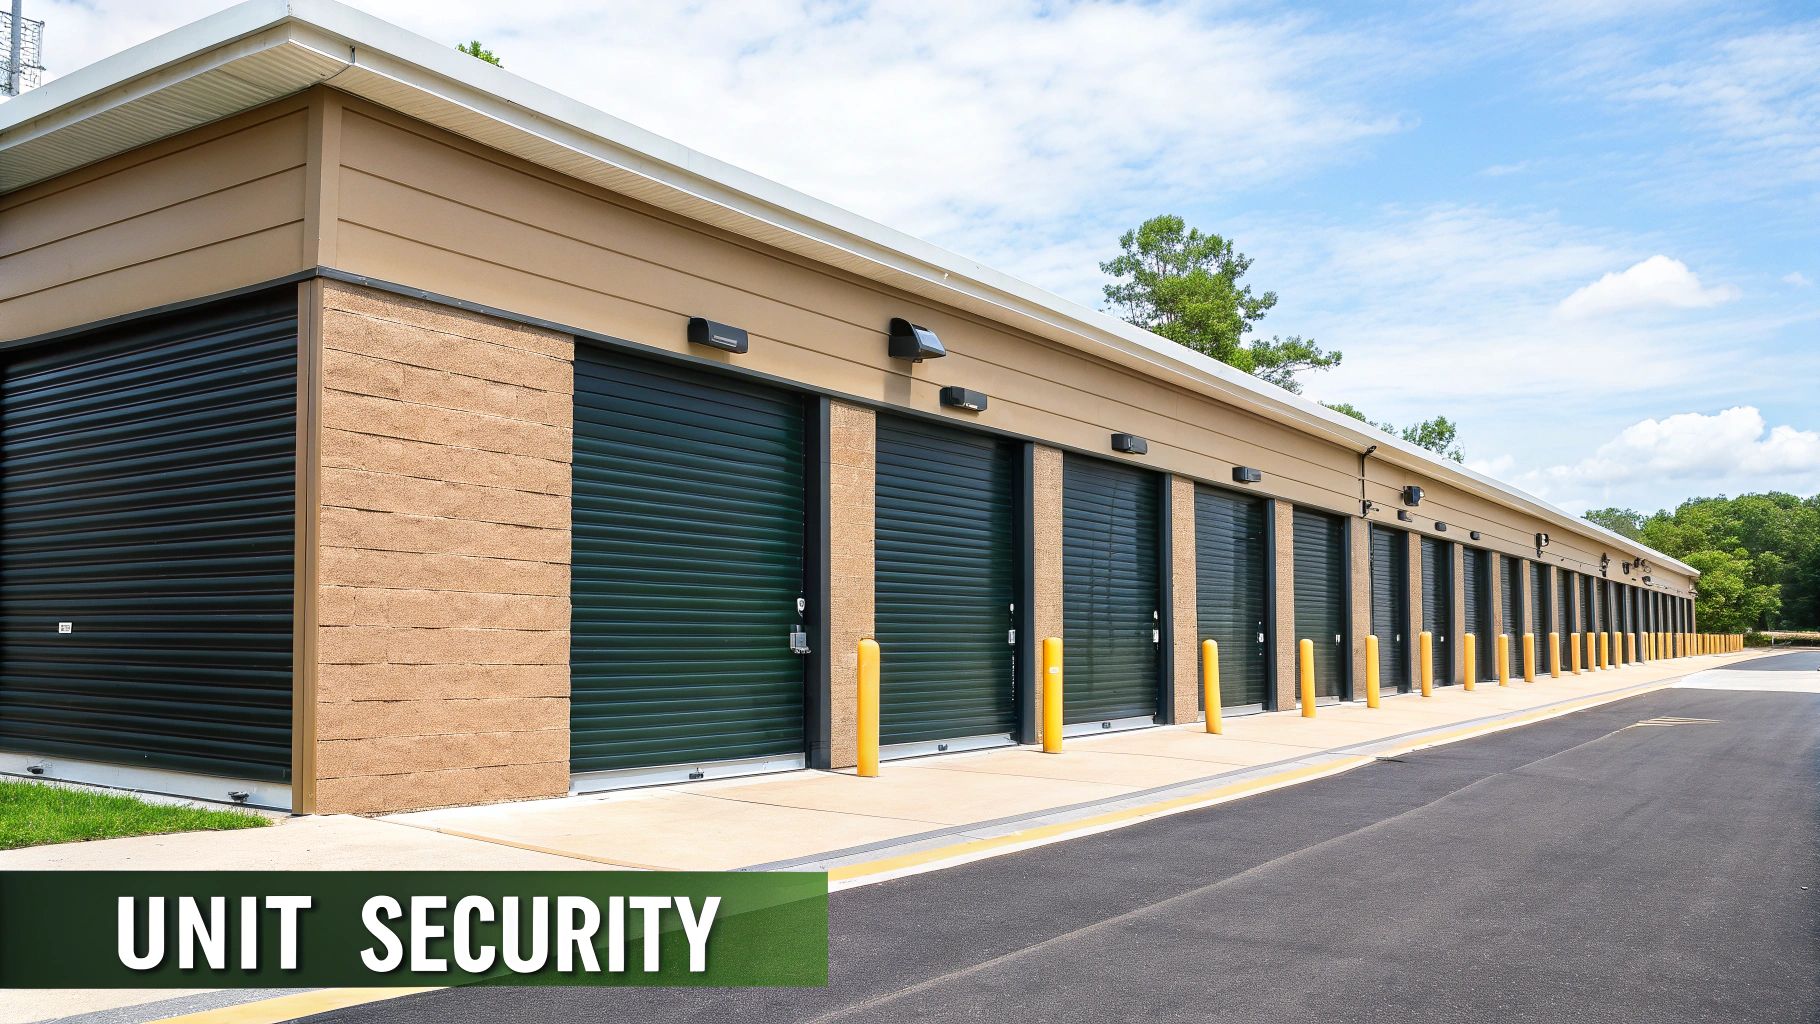
1. Physical Barriers: This is the most obvious stuff. It covers everything from the perimeter fencing and sturdy gates to the actual construction of the storage units themselves. A strong physical barrier is the first thing that tells a potential thief to move along.
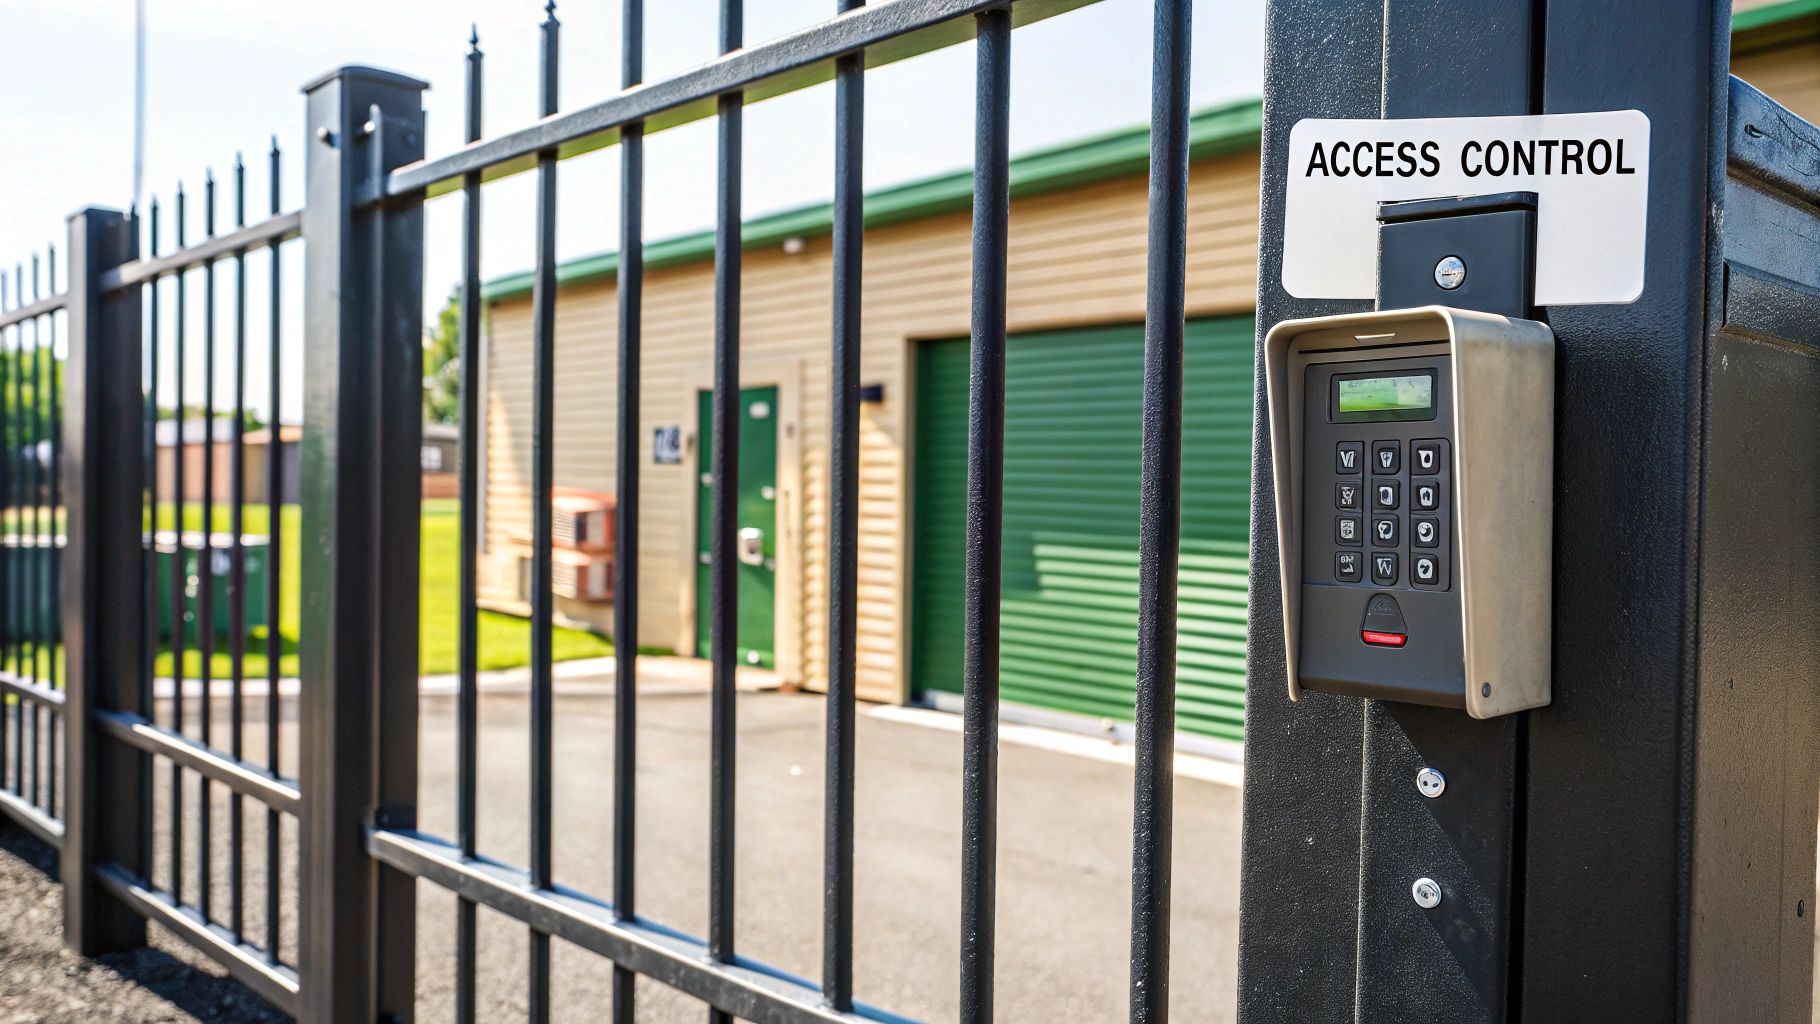
2. Access Control: This layer is all about who gets onto the property and when. We’re talking about things like electronic keypad entry, alarms on individual unit doors, and clearly defined business hours. It’s what ensures only paying customers can get anywhere near the storage areas.
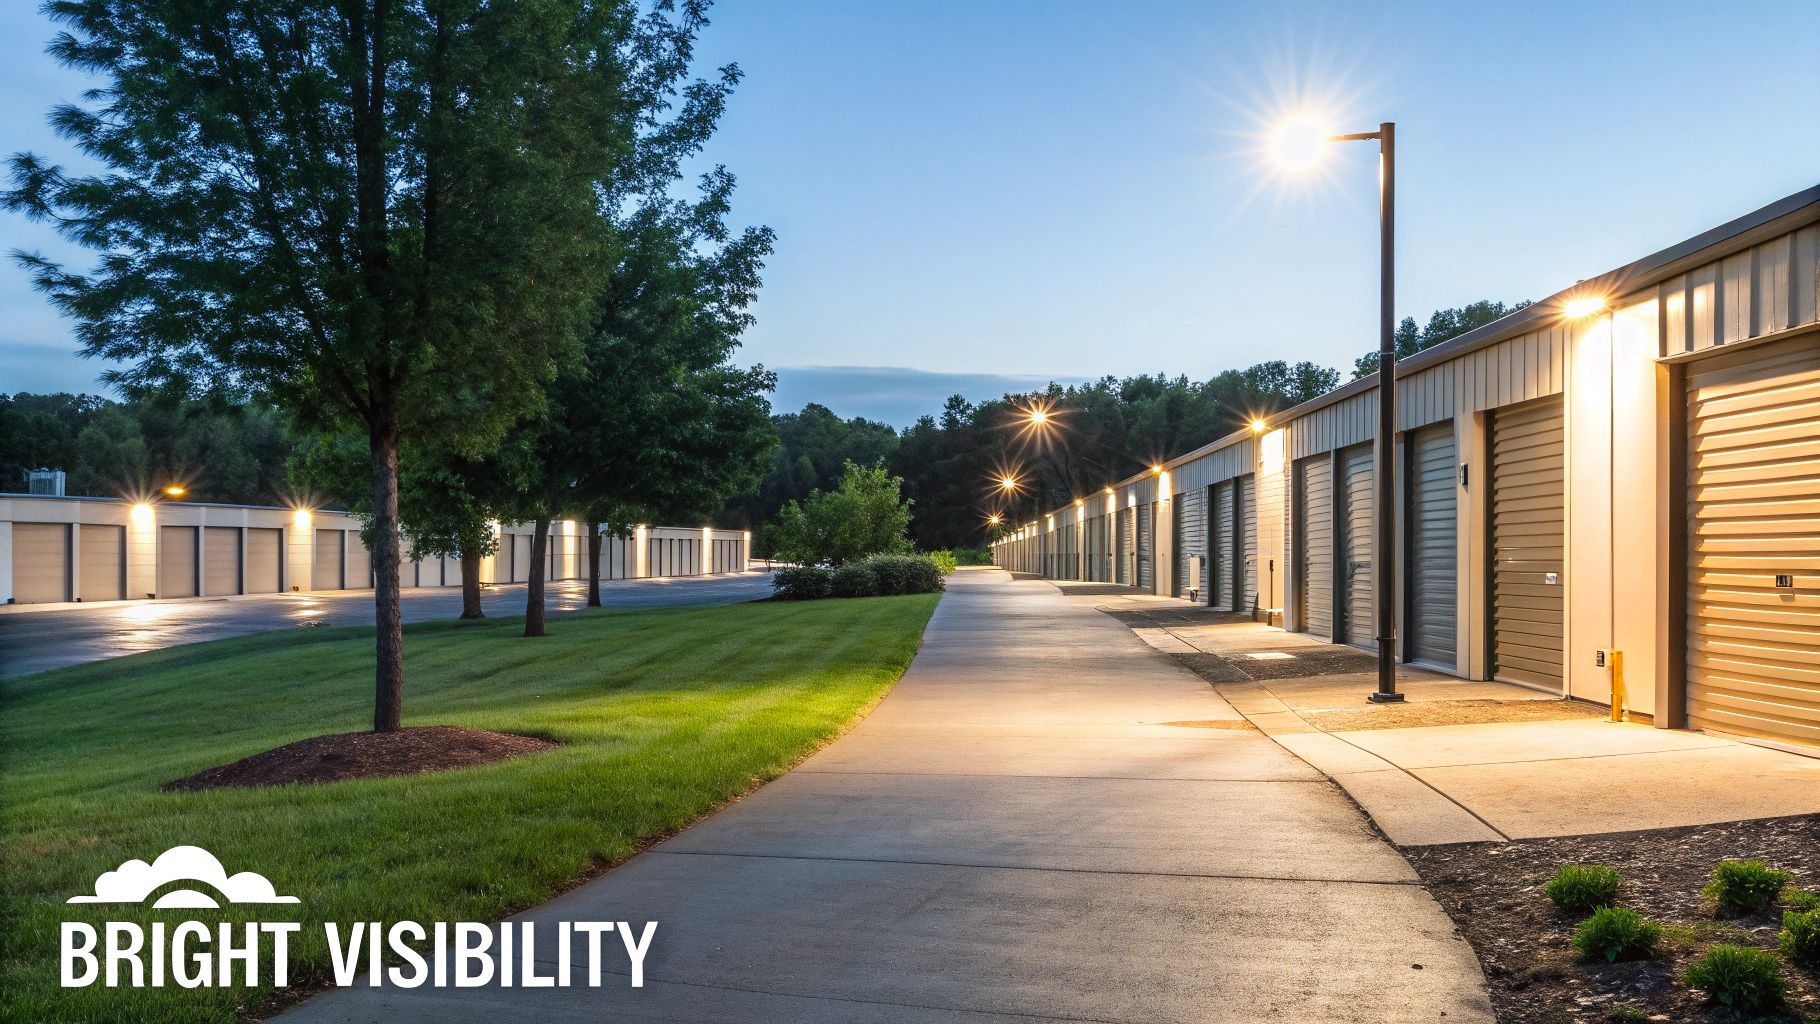
3. Electronic Surveillance: Any modern facility worth its salt relies heavily on technology. This means well-placed CCTV cameras that are actively monitored, bright lighting across the entire site (not just the entrance), and alarm systems that alert management the moment something’s not right.
4. Personal Diligence: This final layer is completely down to you, and it’s critical. It includes choosing a high-quality, tamper-resistant lock, never sharing your access code, and keeping a clear inventory of what you’ve stored. Our full guide to storage unit security dives into how these all work together in more detail.
It's worth knowing that despite what you might worry about, actual break-ins at UK self-storage facilities are statistically quite rare. Security is a top priority for operators, with a third of them planning to invest even more in measures like advanced CCTV and better perimeter fencing.
Once you understand this framework, you can go from being a regular renter to an informed customer. You'll know exactly what to look for—and what to ask about—when choosing a safe place for your valuable possessions.
Decoding a Facility's Security Features
When you're scouting for a place to store your things, you'll hear a lot of security jargon. Terms like "perimeter fencing" and "monitored CCTV" are thrown around, but what do they actually mean for the safety of your belongings? Understanding these features is the key to picking the right facility, not just the closest one.
Think of it like inspecting a car before you buy it. You wouldn’t just kick the tyres; you’d look under the bonnet, check the service history, and take it for a spin. We're going to do the same for security, translating the sales pitch into real-world protection.
This visual breaks down the three pillars that every secure facility should be built on. From the physical walls that keep people out to the digital eyes that watch over the site, they all have to work together.
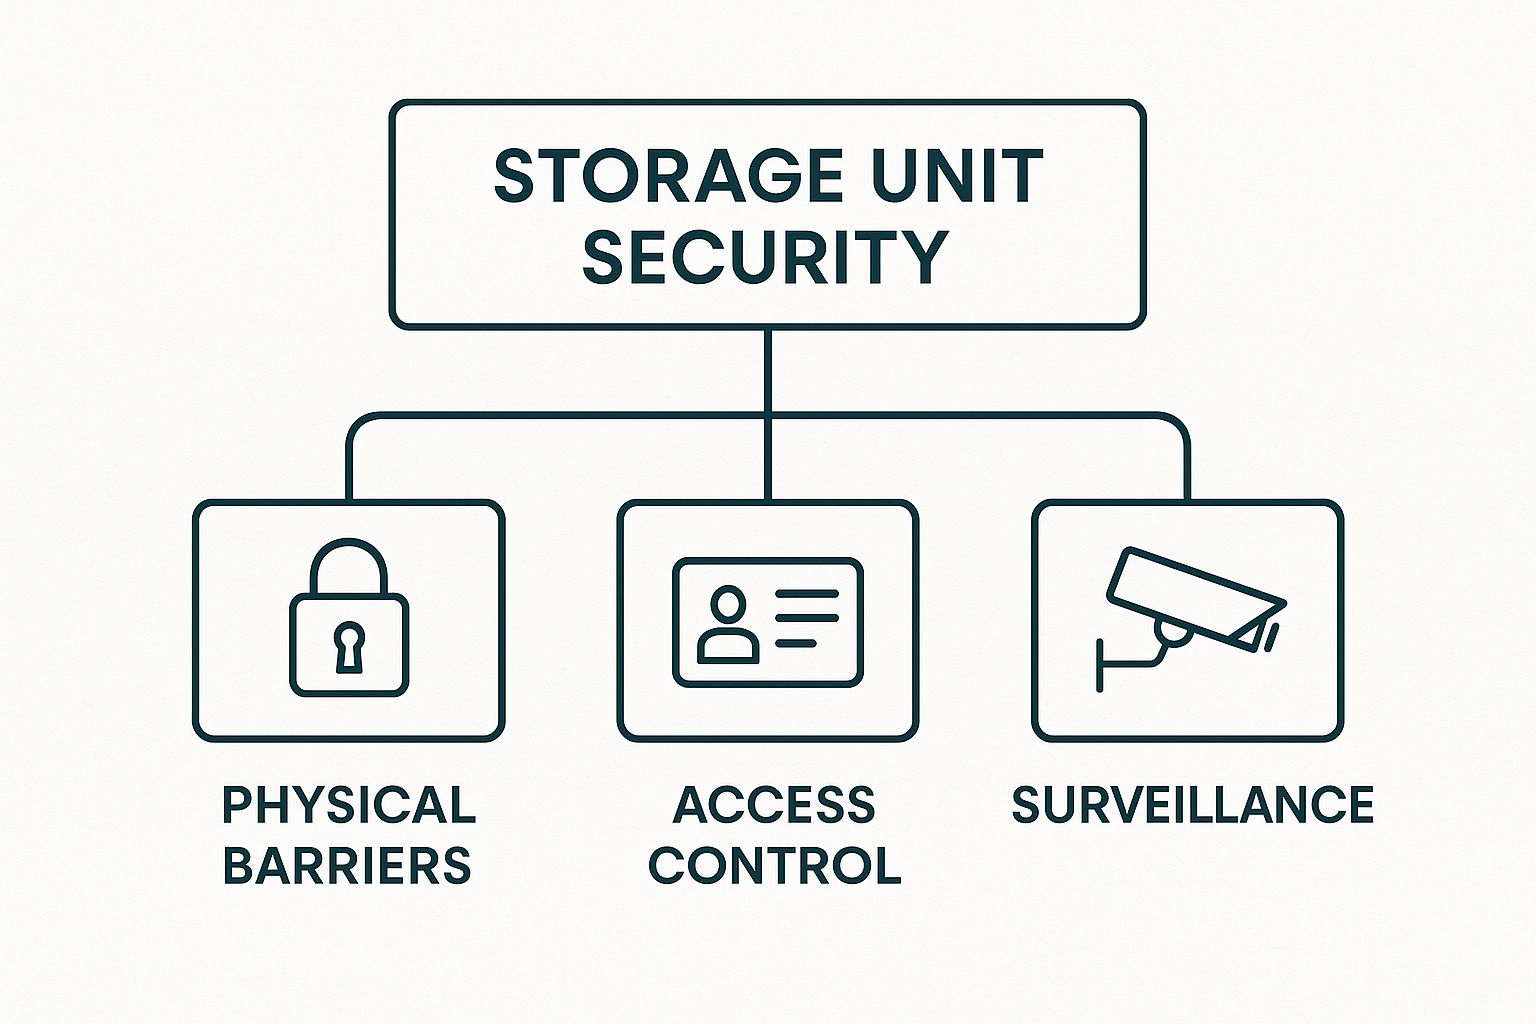
As you can see, it’s not about having one great feature. True security is layered.
The First Line of Defence: Physical Barriers
The most basic and visible layer of security is the physical structure of the facility itself. This is the first hurdle any would-be thief has to overcome, and it needs to be a tough one.
- Perimeter Fencing: A high, solid fence is non-negotiable. Look for anti-climb designs and check for any gaps or damaged sections that could offer an easy entry point.
- Controlled Gate Access: A single, monitored point of entry is crucial. A facility with an open entrance is a massive red flag. The gate should be sturdy and require a unique PIN code or key fob to get in.
- Good Lighting: Dark corners are a thief's best friend. A good facility will be brightly and consistently lit across the entire property, not just at the entrance. That includes down the corridors between the units themselves.
These physical elements are designed to make the facility a "hard target," encouraging opportunists to move on. They're the absolute foundation of good storage security.
Key Takeaway: A facility's security is only as strong as its weakest link. A state-of-the-art camera system means very little if the fence has a gaping hole in it.
To help you compare different sites, here’s a quick-reference table of the key features to look for.
Key Storage Security Features at a Glance
| Security Feature | What It Is | What to Look For (Good vs. Basic) |
|---|---|---|
| Perimeter Fencing | The outer boundary wall or fence of the facility. | Good: High, anti-climb, no gaps. Basic: Standard chain-link, potential weak spots. |
| Gate Access | The main entry and exit point for vehicles and customers. | Good: Automated, individual PIN codes, logs entry/exit times. Basic: Shared code or manual lock. |
| CCTV | Security cameras placed around the property. | Good: High-definition, live monitoring, night vision. Basic: Low-res, recording only (not watched live). |
| On-Site Staff | The presence of managers or security personnel during business hours. | Good: Staff are visible, patrol the site, and actively engage. Basic: Staff stay in the office. |
| Lighting | Illumination across the car parks, corridors, and around units. | Good: Bright, motion-activated in all areas, no dark spots. Basic: Lit only at the gate and office. |
| Individual Alarms | An alarm fitted to each storage unit door. | Good: A common feature in modern, high-end facilities. Basic: Not offered; security ends at the corridor. |
Use this checklist when you visit a potential facility. The more "Good" features you can tick off, the better.
Watching Over Your Belongings: Surveillance Systems
Once you're past the physical barriers, surveillance is the next critical layer. But here's the thing: not all camera systems are created equal. You need to know the difference between a system that just records and one that actively protects.
Recorded CCTV vs. Live Monitoring
Think of a security camera as either a historian or a guard.
A recorded system (the historian) simply documents events as they happen. It's useful for police reports after a break-in has already occurred. In contrast, a live-monitored system (the guard) has someone actively watching the feeds, ready to respond to suspicious activity in real-time.
The UK self storage industry now spans over 64.3 million square feet, and with this growth comes better security technology. Over 90% of facilities offer digital management, often paired with advanced measures like AI-powered surveillance and remote monitoring across more than 2,900 sites. You can read more about these industry security advancements on ClevelandContainers.co.uk.
This shift means top-tier facilities are moving beyond simple recording towards genuine, proactive protection. Always ask if the CCTV is monitored and, if so, what the response protocol is.
Choosing the Right Lock for Your Unit
Even the most high-tech storage facility is useless if you secure your unit with a flimsy, cheap lock. It’s a bit like guarding a bank vault with a diary key. Your lock is the one security feature you personally control, and it acts as the final and most important barrier between a thief and your belongings.
Choosing the right one is no place to cut corners. A weak lock is an open invitation for opportunists, who can cut, pick, or smash it in a matter of seconds. That’s why investing in a high-quality, tamper-resistant lock is a non-negotiable part of good storage unit security.
Top Lock Types for Storage Units
Not all padlocks are built the same. Some designs are simply far better at resisting the most common break-in methods. When you’re standing in the hardware aisle, these are the two types that security experts will almost always recommend.
- Disc Locks: These are the gold standard for self-storage, hands down. Their round shape leaves almost none of the shackle (the U-shaped bar) exposed. This makes it nearly impossible for bolt cutters—a thief's favourite tool—to get any grip. Their internal workings are also generally more complex and resistant to picking.
- Closed-Shackle Padlocks: Sometimes called "shrouded" padlocks, these are a very strong alternative. They have high shoulders that cover most of the shackle, protecting it from being cut. While a top-tier disc lock might have a slight edge, a quality closed-shackle model made from hardened steel still offers excellent protection.
Whatever you do, avoid standard padlocks with long, exposed shackles. That long loop of metal is an easy target for cutters. It's also wise to steer clear of combination locks; they can often be forced or decoded more easily than a solid key-operated lock.
Key Takeaway: The less of the shackle you can see, the better. Bolt cutters are the most common tool used in storage break-ins, and denying them a target is your best line of defence.
What Makes a Lock Secure
When you're comparing different models, a few key features define a lock's real-world strength. This is what you’re paying for when you invest in a proper lock.
First, check the material. The lock body and the shackle should be made from hardened steel. This is significantly tougher to cut or drill through than regular steel.
Next, look at the shackle thickness. A thicker shackle—typically 9mm or more—provides much greater resistance against cutting tools.
Finally, just pick it up. A heavy, solid-feeling lock is generally a good sign of its durability and the quality of its internal parts. These factors are crucial, regardless of the size of the space you’re protecting. If you're still deciding, you can learn more about what size storage unit you might need in our other guides.
Your Pre-Rental Security Inspection Guide
Before you sign on the dotted line or shift a single box, it's time to play detective. A facility’s website can promise the earth when it comes to storage unit security, but an in-person tour is where you see what’s real and what’s just marketing talk. Think of it as your one chance to vet their claims and pick a place that actually takes safety seriously.
Treat your visit like an audit. You're not just looking for a space; you're looking for evidence of a well-maintained, secure environment. A few sharp questions and a keen eye will tell you everything you need to know.
This walk-through is your opportunity to confirm that all the security features we've talked about aren't just there, but are actually working as they should be.
Your Visual Checklist
Start with the basics – the physical defences you can check yourself without asking a single question.
- Fencing Integrity: If you can, walk the perimeter. Are there any signs of rust, damage, or gaps a person could squeeze through? A good fence should be high enough to make climbing it a real hassle.
- Gate Operation: Watch the main gate open and close. Does it look solid and well-cared-for, or is it old, slow, and clunky? A struggling gate is often a sign of poor maintenance across the board.
- Lighting Coverage: Don't just glance at the lights; look for the shadows. Check the corners of the property, the long hallways between units, and the loading bays. Poor lighting is an open invitation for trouble.
If a facility is already failing on these simple points, it's a massive red flag. It tells you a lot about their overall commitment to keeping your stuff safe.
Key Questions to Ask the Manager
Once you've done your visual sweep, it's time to dig a little deeper. The way you ask your questions is just as important as what you ask. You want straight answers, not vague promises. Just as you’d learn how to declutter before moving to get rid of unnecessary items, you need to clear away any uncertainty about the facility's security protocols.
Here are the essential questions to get answers to:
- Is the CCTV actively monitored, or just recorded? This is the big one. Recorded footage is useful after a break-in, but live monitoring can stop one from happening in the first place.
- What’s the response plan if an alarm goes off? Whether it’s at the main gate or on an individual unit, what happens next? Who is alerted, and how fast do they react?
- How often do staff walk the site? A visible staff presence is a huge deterrent. Do they stay glued to the office chair, or are they actively patrolling the grounds?
- Can you explain your access control system? Every tenant should have a unique code. You need to know if these codes are cancelled the second a tenant moves out, preventing old renters from coming back.
Expert Tip: Pay close attention to how the manager replies. If they give you confident, detailed answers, it’s a great sign they have a solid security plan. Hesitation or fuzzy responses? That suggests their security might not be as tight as they claim.
Choosing a storage facility is a big decision. By running through this simple but thorough inspection, you can feel confident that you’re not just renting a box, but investing in genuine peace of mind.
Of course. Here is the rewritten section, crafted to sound like it was written by an experienced human expert, following all your specific instructions.
Smart Strategies for In-Unit Security
While the facility provides the fortress, true storage unit security really extends inside your own four walls. How you organise and protect your belongings is just as crucial as the gate code or CCTV cameras. A strategically packed unit doesn't just maximise your space—it minimises your risk.
Think of it as setting up your own internal defence system. By making your unit a real pain for a potential thief to search through, you’re adding another powerful layer of protection that’s entirely within your control.
Organise for Protection
It might sound simple, but the way you arrange your items can be one of your most effective security measures. A messy, disorganised unit is an easy target. A thoughtfully packed one, on the other hand, creates both physical and visual barriers.
- Valuables at the Back: Always, always place your most valuable items—electronics, family heirlooms, important documents—at the very back of the unit. This makes them the hardest to reach in a quick smash-and-grab.
- Create a Wall of Furniture: Use large, heavy, and less desirable items like old wardrobes, sofas, or chests of drawers to form a solid barrier at the front. This blocks the view from the doorway and makes it physically difficult for anyone to get to what’s behind.
- Conceal Tempting Items: Don't leave the branded boxes for your new TV or computer on display. It’s like an advert for what’s inside. Break them down completely or, at the very least, turn them to face the wall.
This kind of strategic placement means that even if someone managed to get past the lock, they’d be met with a time-consuming challenge, not an easy reward.
Key Takeaway: The goal here is to make a quick theft impractical. By tucking your high-value items out of sight and reach, you make your unit a much less appealing target for opportunistic thieves.
Document Everything and Understand Your Insurance
This is the step everyone skips, but it's absolutely essential. Before you lock that door for the first time, create a detailed inventory. If the worst happens and you face a theft or damage, this documentation will be your most powerful tool.
The Power of a Photo Inventory
It doesn't have to be complicated. Just create a comprehensive visual record of what you’re storing. Walk through your unit and take clear, well-lit photos of everything, paying extra attention to your high-value items. This visual evidence is invaluable for police reports and, crucially, for any insurance claims.
This inventory also serves another, more day-to-day purpose: it helps you remember exactly what you've stored, stopping you from buying duplicates of things you already own. It’s a simple habit that delivers real security and practical benefits.
Finally, you absolutely must get your insurance situation sorted. Never assume your home insurance policy automatically covers items in storage. Many policies have strict limitations or outright exclusions for belongings kept off-site. Always check the small print on your policy. For complete peace of mind, it’s often best to purchase dedicated self-storage insurance directly from the facility. This ensures you’re properly protected against theft, fire, and other potential disasters, giving you solid coverage where it counts.
Of course. Here is the rewritten section, crafted to sound like it was written by an experienced human expert, following all your specified requirements.
What Happens If Something Goes Wrong
Even with the best security in the world, things can occasionally go wrong. Knowing what to do next is just as important as choosing the right facility in the first place. It means you won’t be caught flat-footed during what is already a stressful time.
Think of your rental agreement as more than just a bit of admin. It’s the legal rulebook for your tenancy, and it will clearly lay out who is responsible for what. You’ll almost certainly find that the facility’s liability is minimal. This isn't a red flag; it's just how the industry works. They provide the secure space, but the responsibility for insuring what’s inside that space is firmly on your shoulders.
Your Immediate Action Plan
Finding out your unit has been broken into or your belongings have been damaged is deeply upsetting. The key is to stay calm and follow a clear set of steps.
- Do Not Enter the Unit: If you suspect a break-in, treat it as a crime scene. As tempting as it is to check what’s missing, touching anything could smudge fingerprints or compromise other evidence the police might need.
- Contact the Facility Manager: Tell them what’s happened right away. They need to secure the unit, check their CCTV footage and access logs, and file an official incident report on their end.
- File a Police Report: This is non-negotiable for any kind of theft. The official police report is the cornerstone of any insurance claim you’ll need to make later.
- Notify Your Insurance Provider: Once you have the police report number, this is your final, crucial call. Give them the details along with any information from the facility manager.
Your rental agreement is the definitive guide in these situations. It will almost certainly contain a clause stating that you must have your own insurance, making it clear that the facility isn't liable for loss or damage to your stored property.
Navigating the Insurance Claim
This is the moment where having a detailed inventory, especially one with photos, really pays off. It’s hard to argue with clear, dated pictures of your belongings. It provides concrete proof of what you owned and the condition it was in before the incident.
When you speak to your insurance company, you’ll need to provide your inventory list, photos, the police report number, and any reports from the facility. The more organised you are, the smoother the process will be. Good documentation can turn a potential nightmare into a straightforward, manageable process.
Common Storage Security Questions Answered
Even when you've done your homework on security features, a few specific questions always seem to pop up. It’s completely normal. Getting clear, straight answers helps you move forward with confidence, knowing you haven't missed anything important.
So, let's tackle some of the most common things people ask about storage unit security.
Are Climate-Controlled Units More Secure?
Not automatically, but they often have a built-in security advantage. Think about it: these units are usually tucked away inside a larger building. To get to one, a person would have to bypass the main entrance security and then navigate the internal corridors, which are almost always under camera surveillance.
This is a big contrast to some older drive-up units that are more exposed on the ground floor. That said, never judge a unit by its type alone. Always look at the security of the entire facility.
What Is the Difference Between an On-Site and a Resident Manager?
This is a great question, and the difference is significant.
An on-site manager is someone who works at the facility during business hours. Their presence is a good deterrent, and it means there’s someone there to help if you need it.
A resident manager, on the other hand, actually lives on the property. This is a game-changer for security. It means there’s a presence after hours and on weekends—a powerful deterrent for would-be thieves and a much faster response if any issues pop up when the office is closed.
Is It Safe to Store Valuable Electronics?
While modern security has made storage much safer, you should always be extra cautious with high-value electronics. The risk is never zero.
If you absolutely have to store them, don't leave them near the front of your unit. Tuck them away at the very back, out of sight. Most importantly, make sure you have a detailed photo inventory and that your insurance policy specifically covers electronics up to their full value.
For more general queries on what you can and can't store, our comprehensive FAQs page covers a huge range of topics.
Ready to move and need secure storage you can trust? Euro Move Direct offers flexible, safe storage solutions tailored to your needs. Visit https://euromovedirect.com to get a free quote today.